Monday, December 12, 2011

Pot luck ideas - part I


The holiday season is near and eating is definitely a big part of the holidays! I love hosting festive parties and also attend quite a few parties during the holidays, one thing that always gets me is what to bring to the next pot luck. Pot luck dishes need to be easy to make, can be made ahead and should feed a crowd. Lasagna definitely meets all those criteria, the only problem is that it can hard to serve up sometimes. So this year, I decided to change it up a bit and turn the classic lasagna into a roll –up. It still has all the classic flavours of the traditional lasagna, but it’s a smaller portion size and easier to serve up, perfect for any pot luck and also a made ahead weeknight dinner.

Lasagna Roll-Ups
1 box of Lasagna noodles (approx 14 – 15 sheets)
1 tub of ricotta
1 bunch of spinach (or 1 box of frozen spinach)
1 cup of mozzarella cheese, shredded
½ cup of parmesan cheese, shredded
¼ cup of milk
1.5 lbs of ground beef
1 tbsp oil
1 bottle of your favourite pasta sauce (I used crushed tomatoes and added my own seasoning, but past sauce is just as good)


1. Preheat oven to 375F
2. Cook the lasagna noodles as per packaged direction, drain and set aside
3. Heat oil in frying pan, brown ground beef and add pasta sauce. Simmer until boiled, turn off heat and set aside

4. Cook spinach in a pot of water, drain and chop to small pieces
5. In a mixing bowl, mix together the ricotta, chopped spinach, ½ cup of mozzarella cheese, ¼ cup of parmesan cheese and milk. Season with salt and pepper.

6. Spread half of the tomato sauce mixture to cover the bottom of the baking pan, reserve the other half for later use
7. Put 1 spoonsful of mixture at the end of the lasagna noodle, roll it up, and place it seam side down onto the sauced baking pan

8. Repeat until all mixture is used up
9. Cover the noodles with the rest of the meat sauce, and sprinkle with the rest of the mozzarellan and parmesan cheese.
10. Cover pan with foil and bake for 20 minutes. Remove the foil and broil the top until cheese is golden brown
11. Serve it up and eat it up!

I really hope to post a few more recipes before the holidays, but if I don't, have a great holidays everyone!!!


Thursday, November 3, 2011

Chinese home cooking

Surprisingly, I don’t make a lot of Chinese dishes at home. Chinese dishes are generally easy to execute, but require a lot of ingredients and can be time consuming after a long day of work. This recipe only uses a few ingredients that most home cooks already have at home, maybe with the exception of the Chinese five-spice powder. If you don’t’ have this in your pantry, you definitely should, it gives that special savory spice to any Chinese meat dishes! This recipe is for a classic Shanghai-ese dish, five spice pork chop with veggie (bok choy) rice.


Pork Chop is a staple at our household, the second most consumed meat besides chicken! Pork chops are easy to cook and very versatile I always prefer bone-in chops, they are way more moist and flavorful (not to mention fatty! YUM!). Each chop is slight hammered out with a meat tenderizer, and quickly marinated before frying. The rice is super easy, all done in the rice cooker!

Five-spice pork chops (serves 4)
4 pieces of  boned-in pork chops

Marinade
2 tbsp of soy sauce
1 tbsp of cooking wine (optional)
1 tbsp of sugar
1 tsp of Chinese five-spice powder (this spice is magical!)
2 cloves of garlic, chopped

Seasoned Flour
1 ½ cups of all purpose flour
1 tsp of Chinese five –spice powder (more magic!)

Mix all the marinade ingredients in a medium bowl, mix with pork chops and marinate for 15 min or overnight if you have time. Lightly cover each pork chop with the seasoned flour, shallow fry each chop until golden brown. Viola!

Veggie (Bok choy) rice (serves 4)
3 cups long-grain rice
4 cups of Chinese bok choy, chopped into 2 cm lengths (or roughly)
1 tbsp of chicken bouillon powder (or salt)


Wash the rice, mix the chicken bouillon powder into the amount of water you usually use to make 3 cups of rice (I used 3 cups of water for 3 cups of rice). Add the veggie into the rice, and pour the stock into the electric rice cooker. Stir and set it to cook. Stir the cooked rice with veggie well before serving.


This is a very simple recipe and can be done in a very short amount of time, perfect for a weeknight dinner. There can be different variation to this recipe; you can serve the rice with chicken and also Chinese sausages steamed over the rice.

Monday, October 17, 2011

A little late...


I’ve been experiencing some writer’s block lately, I find myself more drawn to Criminal Minds marathon then adding new entries to this blog. There hasn’t been any lack of “new creations” lately though, the fall always bring out the inner “domestic diva” in me, I love cooking (and eating) in this cool weather, and why bother turning on the heat when the oven is warming up the whole house?! =P
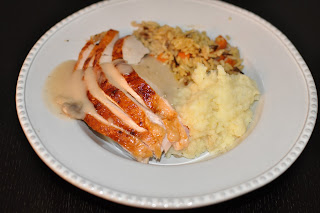
The first holiday of the fall/winter season is of course Thanksgiving, the one holiday that is purely around food in this household! I make the exact same thing every year for thanksgiving, roast turkey with stuffing and my hubby is always very excited. I know a lot of people associate turkey as dry and tasteless, if you are one of those people, then you need to keep reading! I don’t take particular pride in anything I make, but this turkey is going to change your mind definitely! Roasting a huge turkey looks like a very daunting task, but if you follow this (or any similar recipe online), you will be praised by your family and friends at your next turkey gathering!

How to Roast a Turkey

One misconception about roasting a turkey is that the meat will dry out if the timing is not precise, well, obviously if you roast the turkey for too long, the meat will dry out and the skin will be charcoal black. But this problem can be easily solved if you have a good oven thermometer, just turn off the oven the moment the bird reaches 165C. But the secret to a moist, tender and juicy turkey is not in the cooking technique (at least not in my experience), it is in the prep work. I have used the brining method for years, on expensive, organic, grain-fed turkey and also on inexpensive, generic ones, and the results are just as good. Brining is the cooking technique of submerging the meat in a salt water solution prior to cooking, the salted solution allows the cells in the meat to hold on to the moisture while they cooked. This sounds all scientific, but all it means is that we need to soak the whole raw turkey into water with added salt (and other spices) for a period of time before roasting it. The brining step can seem excessive, but it is a small price to pay for a thanksgiving turkey that will blow your mind.

For this year’s thanksgiving, I chose a 9kg butterball frozen turkey, be sure to pick up the ones that DOES NOT contain stuffing. I left the frozen turkey in the fridge for 2 days to defrost.

Turkey Brine Solution (a combination of many different recipes):


- 2 cups of kosher salt
- 1 ½ cups of brown sugar
- 1 onion (cut in half)
- 2 garlic cloves (coarsely chopped)
- 2 sprigs of thyme (optional)
- 2 bay leaves (optional)
- As much water to keep turkey submerged

Roughly dissolve the salt and sugar in 1 cup of hot water (doesn’t have to be fully dissolved), put the rest of the ingredients in and fill the bag with ice cold water. The solution should be cold.

I prepared the brine solution inside a garage bag over the biggest bucket I’ve got, before putting the turkey into the brine, I took out the neck and giblets for later use. The whole turkey is submerged into the brine, garbage bag tied up, place ice and ice packs on top to keep the solution cold. The bucket was kept in a cool area (or outdoor if the weather is cool enough) and let the magic begin. After the 6 – 8 hours of brining, remove the turkey, and pat dry with paper towel before placing it on the roasting pan. Another important note is that the turkey should rest uncovered in the fridge overnight, this will allow the skin to dry up, so the butter/herb mixture will stick on the skin better.

Preheat oven to 350C.


Remove the turkey from the fridge 30min – an hour prior to roasting, spread a mixture of room temperature butter, chopped herbs (thyme, rosemary, etc or whatever you have around the house) and garlic powder onto the turkey skin. There is no need to add salt to the mixture as the bird is well seasoned from the brine already. You can roast the turkey with or without stuffing, I usually do mine with stuffing.

Quick rice stuffing

The stuffing I make is a bit non traditional, it is very popular with my family who always like rice with everything! And the leftover is super tasty. Prepare the Uncle Ben's Natural Select Wild Rice as per direction (the whole package), mix it with sauteed chopped vegetables like carrots, celeries, onion and mushrooms.


Place the turkey in the oven, loosely cover with foil to prevent over burning the skin, baste with drippings occasionally, and depending on your oven setting and size of your bird, it should hit an internal temperature of 165C between 3 – 6 hrs. (My turkey was 9kg, took 3.5 hrs of convectional roasting at 350C). If you are unsure, follow the roasting time on the turkey wrapping. Remove the foil in the last hr for additional browning if desired, ensure to let the turkey rest for 30 min before carving.

Turkey stock gravy
Stock: Boil the turkey neck, gilbets, one onion (chopped in half), a few mushrooms, and one coarsely chopped carrots in a small pot of water, seasoned to taste. Strained the stock and set aside.

Roux: Set aside 1 cup of drippings while the turkey is roasting in the oven (remove the dripping when basting the turkey), heat the dripping in a saucepan, and sprinkle with 1/4 cup of flour. Whisk mixture until thick paste, slowly add the stock into the mixture until no more lumps. Seasoned with salt & pepper to taste, you can add chopped mushrooms or herbs as well. the gravy will thicken as it cools down, add more stock or water if it gets too thick.

 
Viola!!! The end product is going to change your mind about turkey forever, everyone will be fighting for the moist, juicy, tender meat. And the leftovers is even better, it doesn't get dried out even if you reheat it!


Tuesday, September 13, 2011

Monster Birthday Bash - Fun food

Our dear boy Tyler turned 2 this month, and to celebrate this occasion, we threw him the biggest and craziest bash! Like last year, this year was also a back to back birthday parties, one for family and the other for his little friends! Since he is such a little monster and love to terrorize us, what would be more perfect than throwing him a monsters themed birthday bash?!!

Here are a few fun food items I was inspired (by fellow bloggers) to make for this year:


1) Rainbow Cake
I've been seeing different version of the rainbow cake in many blogs, Tyler's Auntie A also made one for her son Jalen's birthday, so I was so tempted to make one for Tyler's birthday too! It's overall pretty easy, and Betty Crocker really helped! I used a box of vanilla box cake mix, made it as per back of the box.
A few tips: 1) Mix more of the first colour, ie. divide the cake mix in 5 portions, but put a little more for one colour. There should be more first colour mix in the bottom of the pan, as other colour mixes get piled on top, the first colour will thin out, so it's important to put more of the first colour mix. 2) For some strange reason, this cake bakes a lot longer (almost double the time) as the normal cake mix, so keep checking. And of course, you can use your favorite cake recipe instead of the store bought cake mix.


2) Jello slices
This is another idea I got while surfing the net and turned out to be a huge hit for the kids and even the parents! I hollowed a bag of oranges by cutting them in half and scoping out all the flesh (and used the flesh for oranges juice). Choose any type of jello you like, I used mango and orange flavor and make as per instructions on the box, but use a little less water to ensure that the jello solidifies in the orange halves. Pour the jello mixture into the halves and refrigerate overnight. Once the jello solidifies, slice each half with a sharp knife! HOW CUTE!!!

3) Fruit Skewers
This was my mommy's idea, instead of serving fruit salad in a bowl, she scoped the fruits with a melon scope and put them on a skewer! It's simple, look great and easy to eat!

4) Cookies n' cream monsters cupcakes adatped from Annie's Eats

Ok, it's getting late, so I'm not going to spend time typing up the recipe for this cookies n' cream cupcake, since I followed it step by step from this blog. I made the cake following the directions and used a simple vanilla buttercream icing instead. The cute little monsters were made from fondant!
Off to bed now, hopefully I have inspired you to make some of these fun food items!!


Friday, September 9, 2011

Last day in paradise!

Hi ya folks! Sorry for the short break from the blog world again, the past few weeks had been crazy busy! Between planning my son's 2 year old birthday bash and preparing for our first family trip! I'm actually blogging from Montego Bay, Jamaica right now! It's our last night here and the trip had been amazing. One would ask why would someone like me have time to blog while on vacation? Let me tell you, I have a son who LOVES to sleep (even on vacation!) and a hubby who loves to take long showers!

Anyhoo, just wanted to write a short little post while I'm still in Jamaica, and I know you guys miss me (ok, I know nobody really reads this blog except a few of my close friends, but who cares, maybe one day I will be featured on Martha Stewart! OK, maybe I have had way too much sun!)! I will be back next week to post about all the fun things I did for Tyler's monster birthday bash and maybe I can even try out some new recipes while I'm at home with Tyler for another week!

Goodnight and YA MON!

Monday, August 8, 2011

Dinner in a bag!

Seafood is considered a "luxury" item for usual weeknight dinner, but it doesn't have to be. Seafood is actually one of the easiest and fastest item to make for dinner. The key is picking the freshest products but can also use in combination with good quality frozen items. My go to frozen seafood is frozen black tiger shrimp, I always have that in stock in my freezer, they are great for pasta and stir-fries.

In this recipe, the chosen seafood is steamed to perfection along with the cooked pasta in a parchment bag.  You might have seen this method of cooking in French cooking shows and think that it's too fancy smancy for you to try at home. But don't be fool, there is nothing fancy about this way of cooking at all, in fact, it's a fool proof way to steaming any type of seafood/fish, you really can't go wrong. The parchment bag creates an environment for the seafood to steam in it's own juices, and the yummy juices get absorbed back into the noodles, and everything just mingle in harmony! (Wow, I'm starting to sound like Giada de Laurentiis, never mind if you don't know who I'm talking about! =P) And the best thing is, there is no clean up, no pots/pans to clean at all!

Seafood pasta in a bag
The following ingredients are enough for one bag/serving, yes, it's a very big dinner portion! Hey, why not?!

5 pieces of mussels
5 pieces of clams
5 pieces of scallops (I used tiny bay scallops)
4 pieces of red snapper chunks (any firm fish like salmon, cod will do)
4 pieces of shrimp
1.5 cup of cooked pasta
1 tbsp of butter
1 clove of garlic, sliced
1/4 cup of canned chopped tomatoes (include the sauce with the tomato)
1/4 cup of chicken broth (white wine would be good too)
Extra virgin olive oil
Salt and Pepper to taste
Chopped parsley

1) Preheat oven to 375F
2) Clean all the seafood until running cold water, pat dry and set aside
3) Mix tomatoes, broth and garlic, then toss with cooked and drained pasta
4) Cut out a big piece of parchment paper (see picture) and fold it in half, then cut it into a half circle shape.
5) Lay the pasta in between the paper, place the seafood randomly on top of the pasta, put a piece of butter on top and sprinkle with salt, pepper and parsley.
6) Fold one side on top of the other, and crease around the edge to create a seal. This is an important step to ensure there is enough steam inside the bag to cook the seafood and also keep in the sauce.
7) Bake in oven for 20 - 25 min, it is ready when all the mussels and clams shells are opened (A bit difficult to see through the bag, but you should be able to tell when you take the bag out)
8) Drizzle with olive oil, serve with lemon, and enjoy with a glass of wine!!


Wednesday, July 20, 2011

Stocking your freezer - part two


It's getting late, and this heat is making me sleepy! I'm going to make this a quick one...another post on how I stock my freezer! We love dumplings around here, all kinds, steamed, boiled and pan fried! I'm always a bit weary about buying frozen dumplings, since I don't know what kind of meat they use, I prefer to make my own. Making dumplings are super easy, only a few ingredients and a little go a long way. They are good served with noodles, but equally good just on it's own! We love them and so does our little guy!

I made two different kind this time, one is a meat filled wonton and one is our stable pork and chives dumplings.

 Wontons
1.5 lbs of ground pork
10 medium size shrimps (chopped into small chunks)
2 stalks of green onions (finely chopped)
1 tbsp soy sauce
2 tsp Shaoxing wine (optional)
1/2 tsp chicken powder
1 tbsp oil
2 tsp sesame oil
50 sheets wonton wrapper

1. Mix all ingredients together, stir in one direction until they bind together
2. Put 1 tsp pork mixture in the middle of the wrapper. Fold one corner to the center, roll one more time.
3. Dab some water on one side of the wrapper and fold with the other side. Press to seal.
4. Freeze the wontons separately on a cookie sheet, and once frozen, they can be put into a freezer bag.

One of the ways to use these wontons is to make Wontons in Red Spicy Sauce, it is a classic shanghai recipe. It's nothing fancy, basically just cooked wonton mix in a spicy sauce.

Wontons in Red Spicy Sauce  
1 tbsp minced garlic
1 tbsp minced ginger
1 tbsp soy sauce
1 1/2 tsp chili oil
1 tbsp chinese black vinegar
1 tbsp sesame oil

1. Bring water to boil and put in wontons, boil for 10 - 15 minutes.
2. Mix all ingredients for the sauce together
3. Take out the wontons and put several into each bowl with a little boiling water
4. Mix a few tbsp of sauce with the wonton and serve.

You can adjust the taste accordingly, we like it HOT!


Pork & Chives Dumplings
1.5 lbs of ground pork
1 package of chinese chives (finely chopped)
1/2 cup of water
2 tbsp of soy sauce
2 tsp sesame oil
100 round dumpling wrappers

1. Mix all ingredients together, mix with a fork until the mixture is well blended, the mixture should be moist.
2. Put 1 tsp of mixture in the center of the wrapper, fold the wrapper in half, seal the edge with water.

3. Crimp the folded side to seal the side.  Freeze dumplings separately, and store in a freezer bag.

Portuguese Chicken - HK style


I started taking an interesting in cooking when I started dating hubby 10 years ago (OMG! 10 years already?), it started with some baking, then went on to a full blown obsession! As I have mentioned before, my inspirations usually come from other food blogs, cooking shows and cook books, but before all of these, there was my mom. My mom was also a working mom, but she always managed to put a yummy dinner on the table.

This week's recipe is definitely an inspiration from my mom, she always made this for my sister and I growing up, and that taste is always on my mind. I don't really know where the name Portuguese Chicken comes from, I wonder if it is really a Portuguese dish or not, all I know is if you grew up in Hong Kong, you must know about this dish. It is similar to curry chicken, but it is not spicy and the creamiest comes from the coconut milk. It is a really easy dish to make and perfect served with rice.

Portuguese Chicken - HK style 
Adapted from http://hungerhunger.blogspot.com/2007/08/portuguese-chicken.html


8 pieces of chicken thighs (cut into chunks)
2 brown onions, in small chunks
2 carrots, in small chunks
1/2 package of mushrooms (cut in half)
2 tablespoons of butter
2 tablespoons of all purpose flour
1 teaspoon of tumeric powder
1 can of coconut milk
1/2 cup milk
3 to 4 cups water
Salt and pepper to season


1. Mix the tumeric into the chicken, season with salt and pepper. Pan fry the chicken and onions in a little bit of veg oil for 4 to 5 min, add the potatoes, carrots, mushrooms, water and simmer 15 min.
2. In a separate pan, put in butter, then turn heat on to medium (so butter won't brown) and when butter has melted, add the flour, stirring well. It will form clumps but continue to fry it under low heat for 1 min. Do not let it brown.


3. Add the coconut milk and the milk a little at a time, stirring well, till a thick cream is formed. Use a whisk to eliminate any lumps.


4. Stir in the milk mixture into the pot with the chicken and vegetables once the chicken is cooked. Let the sauce bubble, then let is cook for about 5 min.


5. Spoon the mixture into an over proof dish, and broil (on HIGH) for 5 min or until top is brown.

Serve with rice!

Tuesday, July 12, 2011

Stocking your freezer - part one

To me, the key to stress free work night dinners is to have a well stocked freezer and pantry. I like to stock our freezer with tons of "meal starters", which makes cooking dinner after work much quicker. I won't lie, this takes time and planning, but the reward is worth it. I've prepared a few of our freezer stables in the past weeks, and one of them is Freezer Meatballs! This meatball recipe is slightly different than the spicy meatball recipe I've previously posted, this one is just as good and with a surprise in the middle!


Freezer Meatballs
Adapted from Martha Stewart

1/2 lb of ground pork
1/2 lb of ground beef
2 large eggs
1/2 cup Italian seasoned dried breadcrumbs
1/2 cup of cheddar cheese, diced
1 tbsp dried parsley
1/4 cup of milk

Mix all of the ingredients (except for the cheese) together until well blended.

Roll a scoopful (similar size to an ice cream scoop) of meat mixture into a ball, stick a piece of cheese in the middle, and roll it back into a ball to make sure the cheese is not expose.


Freeze the meatballs individually on a cookie sheet, once frozen, the meatballs can transferred to a freezer bag for storage.


This is such a time saver, all I have to do when I get home is to preheat the oven to 375F, place the frozen meatballs (right from the freezer) on an oiled oven proof dish. Bake for 25 minutes, and served with any homemade or store bought pasta sauce! Viola! This is a definite 30 minutes meal, move over Rachel Ray!! =P

And the beauty of having these meatballs handy is, they are good with pasta and also as a meatball sub. You can even make smaller versions for soups and little pastas for the kiddies.

Weeknight udon with caramel chicken


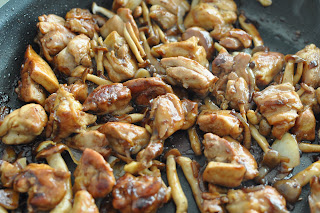
The reason why I haven't been blogging much lately is because between my several failed dinner attempts: Way too sweet teriyaki noodles (which my toddler splat out and kept saying NO NO!) and too sticky pad thai (AGAIN!), I really didn't have much to blog about. But I'm backkk, and with a few new yummy recipes in hand! This one is back to the basics, soup udon served with a caramel chicken. I bet you are thinking "what the heck is caramel chicken, sounds more like a dessert"! But caramel chicken is actually a way of cooking chicken that results in a sweet, deep flavored and very savory chicken.

Caramel Chicken

Ingredients
2 chicken legs, skinned and chopped into pieces
1 tbsp vegetable oil
1 onion, sliced
1 package of brown enoki mushrooms (or any type of mushrooms you can find)
3 garlic cloves, sliced
1/4 cup dark soy sauce
1/2 cup brown sugar
1/4 cup fish sauce


Fry the chicken pieces in the vegetable oil until lightly brown, remove from pan.

Reduce the heat to medium and fry the onion, mushrooms and garlic, cook for 5 minutes

Return the chicken to the pan, add the soy sauce and stir to combine. Cover pan and reduce heat to low and cook for 10 minutes.

Now, for the important part, increase heat to high, add the sugar and stir to combine, cook uncovered for 30 4 minutes, or until the sauce is dark and syrupy. Remove from heat and stir in fish sauce.


See, easy right?? It's delicious, it really is! The sugar is caramelized, it's slightly sweet and just the right balance with the fish sauce. I served this in a simple soup udon (miso soup based, udon noodles, my fav - fake crab meat and a soft boiled egg, YUM!), but this would be really good served with rice to soak up all the savory sauce. A great quick weeknight options for you and your family!